Light can be both a gift and a challenge. It warms, brightens, and defines spaces, but it can also overwhelm them. The rise of modern window tinting has redefined how we interact with sunlight. No longer just a tool for shading, it has become an essential layer of design, comfort, and intelligence.
Window Tinting Denver is no longer a simple dark film on glass. It’s a complex fusion of materials engineered for performance. Modern tints can filter ultraviolet rays, balance heat, and even respond to changing light levels. This evolution turns ordinary glass into a smart, protective surface.
At its core, tinting technology aims to harmonize transparency and protection. The challenge has always been maintaining visibility while reducing glare and heat. Recent innovations have found that balance through adaptive film structures. These films can shift in opacity, responding automatically to light intensity.
One of the newest developments is electrochromic tinting. It uses a low-voltage current to adjust tint levels instantly. A simple signal can turn a clear pane into a shaded barrier. This dynamic control allows buildings and vehicles to adapt seamlessly to changing weather or lighting conditions.
Infrared-reflective tinting has also gained attention for its ability to reduce internal heat. Instead of absorbing sunlight, it reflects specific wavelengths away. This technology keeps interiors cooler without needing darker films. The result is energy efficiency without sacrificing brightness or aesthetic clarity.
Nanotechnology has transformed how tints perform on a microscopic level. Nano-ceramic films, for instance, are crafted with particles smaller than visible light wavelengths. They block harmful radiation while allowing optimal transparency. These films outperform older dyed or metallic tints, providing a clearer, more natural view.
Beyond function, tinting is now part of architectural identity. Designers use it to craft visual flow, emphasize lines, and control mood. Different tint shades can subtly influence ambiance, softening harsh daylight into calm tones. The result is a visual language that speaks comfort and sophistication.
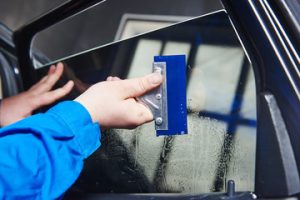
In the automotive world, window tinting has taken on new importance. It’s not only about privacy but also safety. Advanced films can reinforce glass strength, holding shattered pieces together during impact. This invisible layer of protection enhances both comfort and resilience.
For commercial buildings, tinting reduces the strain on climate control systems. By managing solar gain, it decreases cooling costs and stabilizes indoor temperatures. The effect is measurable in both energy bills and environmental impact. Repairing or replacing tint films has become part of sustainable facility management.
Self-healing tints are among the most remarkable innovations today. When minor scratches occur, heat exposure can activate the film’s restorative properties. Over time, the surface smooths itself, maintaining clarity and quality. This durability increases lifespan, reducing waste and maintenance expenses.
Smart glass tinting takes the concept even further. Integrated with digital systems, it connects to automation networks that monitor sunlight and occupancy. The glass becomes an intelligent surface that responds autonomously to its environment. This fusion of technology and architecture transforms how people experience interior spaces.
One of the subtle advantages of tinting is acoustic control. Some advanced films now contain sound-dampening properties. By reducing vibration transfer through glass, they make interiors quieter. This feature is especially valuable in busy urban or high-traffic areas.
UV protection remains a foundational purpose of tinting, but its role has expanded. Modern films can filter nearly all harmful ultraviolet radiation without distorting colors. This safeguards furniture, flooring, and artwork from fading. More importantly, it provides an additional layer of skin protection indoors.
Sustainability drives much of today’s innovation in window tinting. The production process increasingly uses recyclable materials and water-based adhesives. Some films are designed for easy removal and reuse, minimizing landfill waste. This shift reflects a growing commitment to circular design principles.
In residential spaces, tinting enhances more than comfort—it preserves intimacy. It allows natural light while preventing prying eyes from seeing inside. The sense of seclusion without darkness appeals to homeowners seeking balance. It’s privacy through transparency, an elegant paradox of modern living.
Commercial and retail spaces use tinting as part of their branding identity. Different hues influence perception, making environments feel cooler, warmer, or more inviting. The tint becomes an aesthetic instrument shaping how visitors emotionally respond. It’s not just functional—it’s expressive.
Energy-efficient tinting aligns perfectly with contemporary building standards. In regions with high solar exposure, these films can reduce cooling energy demand significantly. This conservation effort contributes to broader sustainability certifications. Each window becomes part of a greater environmental strategy.
Thermal insulation films represent another leap forward. By reflecting infrared heat during summer and retaining warmth during winter, they offer dual-season efficiency. This innovation bridges comfort and cost-effectiveness. It redefines tinting as a year-round solution rather than a seasonal fix.
Digital customization has entered the tinting industry. Films can now be patterned or digitally printed with designs that enhance aesthetics without compromising clarity. This creative approach allows functional art on every window. It merges architecture, privacy, and visual storytelling in one medium.
Safety-focused tinting extends to security-grade films that deter intrusion. These ultra-strong layers bond tightly to glass, making forced entry more difficult. They delay break-ins, providing crucial time for response. Their subtle presence belies their powerful role in modern safety design.
Tinting has also embraced health-conscious technologies. Some advanced films contain antimicrobial coatings that prevent bacterial buildup on glass surfaces. In shared environments like offices or public transport, this innovation adds a quiet but vital form of protection. Clean light now pairs with clean surfaces.
Electrostatic tinting systems introduce another frontier. They rely on static adhesion rather than permanent adhesives, allowing easy installation and replacement. This makes tinting flexible for renters or temporary structures. When removed, no residue or damage is left behind.
Environmental adaptability has become central to tinting development. Some films now react not just to sunlight but also to temperature or humidity changes. This multi-sensory responsiveness ensures optimal comfort regardless of weather conditions. The glass behaves like living material—aware and reactive.
In luxury spaces, tinting enhances ambiance and exclusivity. It filters light into a soft glow that flatters interiors and adds a serene tone. The subtle gradient of shaded glass communicates refinement without effort. It creates calm zones where design meets tranquility.
The rise of augmented-reality-compatible glass marks a futuristic step. Some tints can adjust optical reflection to improve display visibility. This innovation supports integration with digital projection and interactive media. It redefines glass as both barrier and interface.
Homeowners are also discovering how tinting reshapes living habits. By maintaining cooler rooms and minimizing glare, it encourages natural light use over artificial lighting. Over time, this simple change alters energy patterns in daily life. Tinting thus promotes mindful, efficient living.
In the transportation sector, tinting evolves with aerodynamics and visibility demands. Films now resist distortion at high curvature levels, maintaining clear sightlines. They also integrate with sensor-based systems that rely on optical accuracy. Repair and replacement must meet these technological standards precisely.
The visual comfort provided by modern tints improves human well-being. Glare reduction reduces eye strain, enhancing concentration and mood. The gentle diffusion of light supports circadian balance, particularly in window-rich workspaces. It’s a subtle improvement with profound psychological benefits.
Some researchers are exploring energy-harvesting tint films. These experimental tints can generate electricity by converting sunlight into usable energy. Imagine windows that not only block heat but also power interior devices. This concept merges solar energy with design elegance.
Commercial greenhouses are beginning to adopt adaptive tinting as well. These specialized films control heat and light balance for optimal plant growth. By adjusting transparency based on sunlight, they protect crops while reducing artificial lighting costs. This innovation connects agriculture with environmental technology.
Another futuristic direction involves holographic tint layers. These films manipulate light waves to create specific visual effects or optical illusions. While still in development, they open doors for architectural creativity and energy-efficient lighting. The result is both artistic and functional brilliance.
Maintenance of tinting has become easier with hydrophobic coatings. These surfaces repel dust, oil, and water, keeping glass cleaner longer. It reduces the frequency of cleaning and maintains optical clarity. Less upkeep means more longevity and consistent performance.
Digital connectivity now extends even to tint maintenance systems. Some smart tints send alerts when their optical performance declines. Facility managers receive updates on degradation levels or replacement needs. This proactive approach ensures long-term efficiency without guesswork.
Environmental regulation has encouraged manufacturers to innovate non-toxic tinting formulas. Solvent-free adhesives and biodegradable substrates are emerging standards. This shift ensures safety during both installation and disposal. Window tinting is aligning itself with global eco-conscious movements.
As urban density increases, the demand for privacy rises. Window tinting becomes a subtle but powerful response. It shields personal spaces without isolating them from daylight. The balance it offers speaks to the essence of human comfort—protection without confinement.
Educational institutions and laboratories are finding new uses for tinting too. Controlled light exposure supports experiments and prevents equipment overheating. Custom tinting creates stable, safe conditions for delicate materials. This precise regulation of light reinforces both accuracy and comfort.
Innovation in tint adhesives has solved many past issues like bubbling or discoloration. Advanced polymer bases expand and contract naturally with temperature changes. This flexibility ensures long-lasting adhesion and visual consistency. The result is reliability under varying environmental conditions.
Tinting has moved beyond function to emotion. The tone and shade of light influence how people feel within a space. Warm tints foster relaxation, while cool tones sharpen focus. The subtle play of light color becomes a tool for mood architecture.
In the future, tinting may integrate with artificial intelligence systems. Buildings could analyze data to adjust tint dynamically based on energy use, sunlight, and occupancy. Each window becomes part of an intelligent ecosystem that thinks about efficiency and comfort. The architecture of tomorrow will literally respond to light itself.
The silent evolution of window tinting represents a harmony of science and design. It protects, beautifies, and energizes spaces in ways once unimaginable. Behind every smooth sheet of glass lies a universe of microscopic engineering. This quiet innovation continues to redefine how humans see and feel the world around them.
As technology advances, tinting will become more intuitive and interactive. It will no longer be something applied, but something designed into every pane from the start. The boundaries between glass and intelligence will blur, creating dynamic, living architecture. Window tinting, once simple shade, is now the language of light itself.