The Benefits of Insulation

Perth Insulation improves comfort and energy efficiency, reducing monthly energy bills. It is available in various types and materials to suit different climates and needs.

Keeping warm requires insulation that limits heat transfer. Cats fluff up their fur, and birds wrap themselves in layers of feathers to trap air and reduce the flow of heat energy.

Insulation inhibits the migration of thermal energy into and out of a building, saving money on heating and cooling costs. It is a key part of energy conservation and helps reduce emissions that contribute to global warming. Insulation is also useful for reducing noise levels.

Insulating material is generally made of fibrous materials such as fiberglass, rock wool, cellulose, and natural fibers. These are used for both thermal and acoustic insulation. Foam-type insulators are also common and can be injected into walls, ceilings, and roof cavities to provide excellent thermal and acoustic insulation.

The thermal insulating properties of insulation are measured by its resistance to conductive heat flow (R-Value). A higher R-value means greater insulating efficiency, which is affected by the size and thickness of the insulating material and the air spaces within it. An insulation product is effectiveness also depends on the climate and the installation method.

Conductive heat loss is the most significant way a home loses heat. It is caused by differences in temperature between internal and external areas. The temperature difference is due to a combination of convection, radiation, and conduction. Insulation reduces the rate of conductive heat flow by slowing down the transfer of thermal energy and trapping air in its layers.

Radiation is another major cause of heat loss and it is the process by which hot surfaces radiate heat. This can be felt as you hold a warm cup of coffee, or when sunlight warms your skin. Insulation can reduce the amount of radiant heat that escapes from a living space, as well as reflecting existing radiant heat inside the home.

Insulation can also be utilised to prevent air leaks in the building envelope, which can allow cold air into the home and warm air out. Air leakage can be reduced by installing insulation around door and window frames, as well as by sealing any gaps or cracks. Some insulation products also have reflective surfaces that can help to further reduce radiant heat loss.

Insulation reduces the need for heating and cooling, allowing a building to stay at a more stable temperature, which in turn reduces the mechanical stresses placed on equipment. This can extend the life of equipment and reduce maintenance and operating costs, as well as lowering energy consumption and environmental impact.

Prevents Draughts

Insulation can prevent unwanted draughts in your home, especially during cold weather. Draughts often come through gaps and cracks around doors, windows, exhaust fans and fireplaces. Draught proofing stops warm air escaping from your home in winter and hot air entering in summer, saving energy. Insulation can also help to reduce the noise caused by draughts, making your home more comfortable.

Depending on the type of insulation you choose, it may also act as a fire retardant, helping to protect your family from fire damage in the event of a fire in your home. It can also help to protect the integrity of your roof and walls by acting as a barrier against moisture, which can cause mould and other structural problems in your home. This is particularly important for older homes, which can often have serious issues with condensation and water leaks that will lead to costly repairs in the future.

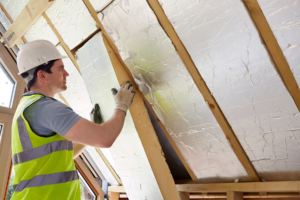
Ceiling insulation is an effective way to reduce heat loss from your home. During construction, insulation can be installed between the ceiling joists to provide an effective thermal barrier. It can also be retrofitted to existing homes by installing insulation in the ceiling space. Insulation can also be used to create an energy efficient wall by sealing gaps between framing in new construction or by stapling a blanket to the outside of existing walls.

When you use less energy in your home, it saves money and reduces greenhouse gas emissions. This is because the energy that is saved is not produced by burning fossil fuels, which causes pollution. Insulation can also be used to help improve the performance of pollution control equipment in commercial buildings.

A well-insulated home is more comfortable and cheaper to run than an uninsulated one. It can also help to improve indoor air quality (IAQ), which could reduce respiratory issues and allergies and increase productivity in work spaces. Additionally, insulation can protect your home against external pollutants and allergens such as dust mites, fungi and radon.

Reduces Moisture

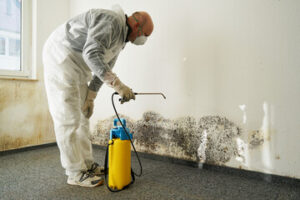
Moisture is a leading cause of mold and other damage to building materials, and it can also contribute to rot and the growth of pests. Insulation plays a critical role in moisture control, both in preventing condensation and helping dry out the building quickly if it gets wet. The hygroscopic properties of some types of insulation, such as mineral wool and cellulose, can even help control indoor humidity levels by absorbing moisture before it reaches the dew point.

Insulation can help reduce the amount of moisture that enters a home or building, and this is important because high levels of humidity make it feel hotter in the space, forcing people to use air conditioning more frequently, which can drive up energy bills. Additionally, moisture in a home or building can damage materials, such as wood framing, and encourage the growth of toxic molds.

To prevent this, a good insulation should have a high vapor retardance rating. In addition to a well-functioning vapor barrier, other measures that can be used to control moisture in a home or building include ensuring that water drains away from the foundation, using a waterproof membrane between the foundation and sill plate, and providing proper ventilation.

Another way that insulation helps prevent moisture problems is by providing a barrier against air leaks, which can allow water to penetrate the structure and cause damage. This is why it’s important to use a professional when installing insulation in a new home or building.

Insulation can also be one of the most sustainable construction products available, particularly when it’s made from recycled paper. The manufacturing process of cellulose thermal insulation, for example, uses significantly less energy than most other major insulation products. This is because cellulose is made from paper products that are reduced to a pulp, then fiberized and densified before being blown into place.

The resulting insulation is highly fire-resistant and can be treated with boric acid to further increase its durability. For further peace of mind, it’s worth considering a contractor that is ABAA certified and can provide a comprehensive air sealing and insulation service, which will improve the results of your investment.

Reduces Noise

As well as keeping your home climate-controlled, insulation acts as an effective barrier that blocks out unwanted noise. It helps create a quieter environment, allowing you and your family to focus on work, relaxation and other activities without distraction. Insulation can also reduce the effects of noise pollution caused by neighbours, traffic and other sources outside your property.

Insulation is an excellent soundproofing solution, particularly in multi-level homes, apartments and townhouses where the walls are shared with other residents. It reduces the amount of external noise that penetrates into living areas and bedrooms, allowing people to enjoy a more restful sleep.

The way in which insulation reduces noise depends on the type of material and its thickness and density. Some insulation materials such as cellulose and fiberglass are able to absorb sound waves by dampening or dissipating their energy, thus reducing their intensity and the level of noise pollution. Other insulation materials such as concrete, brick or gypsum board are effective at blocking noise waves by creating a physical barrier that stops them from passing through walls or ceilings.

Choosing the right type of insulation for your home depends on the type of sound you want to reduce, its frequency and intensity, as well as costs and space limitations. For example, solutions that absorb sound are ideal for reducing airborne noise such as music, television or loud talking, while those that block sound are best suited to basements or other spaces in the home where you would like to decrease impact noise from upstairs neighbors or mechanical equipment.

Insulation for sound reduction is an investment that not only improves comfort and wellbeing in your home but can also add value if you’re considering selling your home in the future. If you’re interested in enhancing your property with quality insulation that prevents heat loss, prevents draughts and reduces moisture, contact Koala Insulation of The Space Coast today for a free, no-obligation quote. We can assist with a range of insulation solutions for your home, including wall and ceiling insulation. We can even advise on other energy efficiency measures you may want to consider.

What Are The Benefits of a Septic tank?

A septic tank collects wastewater from your toilets, showers, sinks, garbage disposal, and washing machine. Microorganisms break down the solid waste, which sinks to the bottom of the buried container and forms sludge. Oil and grease floats to the top and forms a layer called scum. Click https://www.septictankarmadale.com.au/ to learn more. Compartments and the septic tank outlet prevent sludge and scum from leaving the tank with the liquid wastewater (effluent).

The liquid waste, or effluent, exits into a buried drain or leach field.

The absorption field is an area of uncompacted, unsaturated soil that receives and treats wastewater that exits the septic tank. The soil acts as a physical, chemical, and biological filter to purify the effluent before it reaches groundwater or surface water. Soils must be properly sized for the volume of wastewater so that they can easily absorb it without overloading and clogging the system.

If wastewater is not absorbed, it can enter groundwater, exposing people and pets to disease-causing organisms that contaminate the water supply. A contaminated water supply can also contaminate the home’s plumbing fixtures and surrounding landscape. A septic tank that fails to treat the waste properly can also pose a public health risk.

A septic tank is a buried, watertight container that holds household sewage long enough to separate the solids from the liquid. The solids settle to the bottom, forming sludge, while oil and grease float to the top, forming scum. A T-shaped outlet prevents sludge and scum from leaving the tank and traveling into the drainfield area. Liquid wastewater (effluent) exits the septic tank through the watertight, 4-inch-diameter pipe leading to the absorption field.

An undersized or poorly constructed absorption field is a common cause of failure. The size of the absorption field is based on the number of bedrooms in the house and the soil’s ability to absorb and retain wastewater.

Place a wood board or stick down into the septic tank to determine sludge depth and mark where it comes to rest. Next, push the board or stick into the sludge until you feel resistance and mark again. The difference between the two marks indicates the maximum sludge depth.

Before the septic tank can function properly, the soil in the absorption field must be able to accept and process wastewater without overloading or clogging the system. The soil must also be able to percolate water at a rate equal to or faster than the household sewage load.

Before constructing a new septic tank or absorption field, four perc holes are dug at the proposed site to determine the soil’s percolation rate. The slowest rate is used to size the absorption field, which must be at least 300 square feet per bedroom of the house for a conventional septic system.

Seepage Pit

A septic tank is a watertight container that holds wastewater long enough for solid waste to settle. When the liquid wastewater, also called effluent, exits the tank, it flows through a drainfield where microorganisms further treat it. The septic tank is usually made of concrete, fiberglass or polyethylene, and it has compartments for different types of waste. Solids, such as fats, oils and greases, sink to the bottom of the septic tank and form a layer known as sludge. The liquid wastewater floats to the top and is commonly called scum. Microorganisms break down these layers to form the clean wastewater.

Once the septic system is fully treated, the effluent seeps into the soil through the absorption field, returning to the natural water and weather cycles. This process is environmentally friendly and reduces the risks of sewage contamination for everyone who lives or visits your property.

It is essential to maintain proper maintenance on a septic system to extend its lifespan and prevent problems such as clogs or leaks. The septic tank needs to be pumped regularly, and you should make sure that all household products are safe for your septic system. This includes items like dental floss, paper towels, pet litter and bleach, which can all cause clogs. In addition, it is important to not park vehicles or construction equipment over the absorption field and other septic system components.

If you are considering buying a home that has a septic system, you should request that the seller provide you with a septic inspection report. Having this information will help you determine whether the system is in good working condition and can be maintained adequately for its intended lifespan. You may also want to consider submitting a contingent offer on the home, which is an offer that is dependent on passing septic inspections.

If you have questions about septic systems or need to schedule a service, contact Precision Excavating Inc. Our team is licensed by the Board of Health in Westchester and Putnam, NY to install and repair septic systems. We follow all local regulations to ensure that your septic system is operating properly. Call today to set up an appointment.

Inlet and Outlet Tees

Septic tanks are large underground containers designed to hold raw sewage for a specific duration. They have baffle walls that expertly segregate and direct the flow of wastewater to allow solid waste to settle and liquid effluent to exit. The inlet and outlet tees are critical parts of this process and are vitally important to the health and safety of your septic system.

When wastewater enters a septic tank it first hits the inlet baffle. This slows the flow and prevents scum from collecting and blocking the inlet pipe. The inlet baffle also helps to reduce the movement of gases from the septic tank back into the home or business it serves.

Once the septic tank contents have been treated the liquid effluent exits through the outlet pipe. This is a very important point and if it is not done correctly it can cause severe problems for the absorption field. The outlet pipe should extend at least 2 or 3 inches deeper than the top of the inlet tee. This is to prevent septic tank scum and sewage from running out the tank outlet and clogging up the absorption system or drainfield.

The outlet pipe should also be fitted with a sanitary tee. This tee is designed to regulate the opening of the tank so that solid waste, grease and other trash can not enter the absorption field. If the sanitary tee becomes blocked, a blockage in the septic tank or if the tee is missing altogether it could allow solid waste, grease and trash to enter the drain field and damage it.

If the inlet or outlet tee is damaged, it should be repaired immediately. This will help prevent odors and possible contamination of the absorption field or the surrounding property. It is also a good idea to have the tees checked and replaced as necessary at routine septic tank pumping.

This photograph by architect Waters shows the replacement tee parts used to repair this septic tank inlet baffle. He used a 22 degree elbow rather than a straight connection on the new tee to avoid bringing it too high up in the tank. It is important to have the tee fittings in the septic tank slope upwards so that incoming wastewater can not enter the tank and cause a buildup of sludge.

Pumps

Depending on how much you and your family use the septic system, you may need to have the tank pumped every three to five years. A septic system that is not properly maintained can lead to problems including clogs and backups in the drain field and contamination of groundwater. Pumping the septic tank removes solid waste that settles to the bottom of the tank, which prevents this material from entering the drainfield. This can minimize clogs and backups in the home and protects the absorption field from contamination by raw sewage.

A septic tank typically contains a series of pumps that control the flow of wastewater through the system. The system can be connected to a sewer system in some cases. The septic tank also contains a large lid with inspection ports that are used for access and cleaning of the septic system components.

The septic tank includes a series of float switches that control the operation of the pump. The lower float is the “pump enable/off” float. When this float tips to the up position it enables the pump to run. When the upper and middle floats tip to the down position, the pump stops running.

The wastewater that enters the septic tank is separated into liquid effluent and solid sludge. The liquid effluent is allowed to exit the septic tank through a large, central service hole. The sludge layer slowly builds up in the tank over time until it reaches the level of the outlet hole. When the sludge layer reaches this point, it must be pumped out by a licensed septic contractor.

Having a septic system installed in your home is the best way to protect the health and safety of your family. However, the septic system will not work without proper maintenance and regular pumping. It is also important to avoid flushing anything other than toilet paper and human waste. Items such as hair, grease and foreign objects can clog the system and cause a backup in the drain field or home.

Septic tanks should be mapped out so that system components can easily be located and accessed. This will help to prevent damage during home renovations, yard work and vehicle and equipment use. It is also recommended to keep shrubs, trees and other long-rooted plants away from the absorption field as they can grow into and clog pipes.

The Benefits of Having a Security Camera in Your Home Or Business

License Plate Recognition Camera are critical tools for businesses. They can deter theft, fraud, and physical violence. They also help identify potential problems like tardiness or excessive internet use and empower management to respond quickly and efficiently.

They can also monitor home environments, allowing owners to do so remotely via an app. Some even come with smart home features like geofencing, Alexa compatibility, and mobile alerts.

Monitoring a security camera is a snap with today’s technology. Whether your camera is wired or wireless, you can monitor it from your mobile device or computer anywhere. Depending on your camera type, you may be able to control it via an app. This is great if you want to watch your home or business when you’re away.

Some cameras are also designed to work independently, without being connected to a computer or other device. This allows for easier installation and use. This kind of camera can also be used in areas where Wi-Fi coverage is limited or unavailable, such as outdoors.

For businesses, monitoring security cameras can help prevent internal theft and other kinds of fraud. For example, surveillance cameras can alert you to red flags that might indicate employee misconduct, such as excessive internet browsing or frequent tardiness. This can save your company time and money by catching problems before they become serious issues.

Many security cameras come with an alarm feature, which can alert the police if a disturbance is detected. Some of these cameras also have the option to grant emergency response center personnel temporary access to livestreams, so they can see what’s going on in real-time. This supposedly speeds up the time it takes for police to respond to an incident.

If you’re concerned about privacy, consider getting a camera that encrypts its footage using AES-256 bit encryption. This is the same level of encryption used by the U.S military. It’s also helpful to read up on a company’s history of data breaches, as this can give you insight into how likely it is that your information will be compromised.

When installing a DVR/NVR, make sure all the cameras are properly configured to display their feeds on the correct channel. Typically, the rear of the DVR/NVR has multiple BNC or RCA inputs that the cameras plug into. Check your camera’s user manual to find out which input channels are associated with the specific cameras. Once you’ve got all the inputs set up correctly, you’ll be able to view your cameras remotely.

Deterrence

A security camera is a great deterrent against break-ins, theft, vandalism and other unwanted intrusions on your property. A security camera will alert you and the authorities in case of an incident, but it can also help prevent crime from occurring at all. This is because criminals are often hesitant to enter a premises where they know that there are security cameras present. This will ensure that your business, inventory and other onsite equipment remains safe from burglaries or any other unwanted incidents.

Active deterrence refers to security cameras that can take actions on their own to scare potential intruders away. These cameras may flash red and blue lights, sound a loud siren or talk down to anyone they see, in an effort to discourage anyone from taking any unnecessary risks.

Some active deterrence security cameras are able to detect motion and then distinguish between different types of movement, such as cars, animals and people. These cameras then only record what is relevant, which saves valuable storage space and battery power. Other smart features that can be found on some active deterrence security cameras include voice control and geofencing, which allows users to remotely disarm the camera or set it to arm via an app.

Many surveillance cameras also come with a built-in spotlight that can be activated when it detects any type of movement. These cameras are often used in areas where there is a lot of foot traffic, such as busy crosswalks, large parking lots and malls.

Another form of active deterrence is the ability of security cameras to communicate with one another and act as a sort of virtual security team. This can be done through a system of sensors that can send data to each other in real-time, such as motion detectors, door/window sensors and infrared sensors. This will allow each camera to respond in a unique way, such as opening and closing a window, turning on lights or putting on a siren, depending on the situation. These systems can be installed to work with existing business systems, such as alarms or access controls. They can also be connected to a security system through Wi-Fi, with the option of wirelessly connecting to a recorder or storing video on an onboard microSD card.

Security

A security camera captures video footage on commercial properties. It’s a useful tool to help protect businesses from theft and other crimes. It’s also a great way to monitor employees’ behavior in the workplace.

Most modern security cameras feature high-definition video recording and crisp imagery. They can also capture audio. Some cameras can be accessed on mobile devices, making it easy to check up on the property from a remote location.

The type of surveillance camera you choose will depend on the size and scope of the area that needs to be covered. For instance, bullet cameras are ideal for narrow areas because of their size and directional capabilities. Dome cameras, on the other hand, have a rounded shape and offer a wide field of view. Both types of cameras are available in a variety of colors, allowing you to choose one that best matches your property.

Security cameras are typically powered by electricity. They connect to the internet through a network and record video data onto either cloud or local storage, depending on your preference and industry regulations. Some of the more advanced systems can backup footage on a local SSD or HDD while simultaneously transmitting it to the cloud for storage and access.

There are some security cameras that only record when motion is detected. Some can even notify the owner of a break-in or other event via text or email. Others have a built-in microphone and can capture audio in the vicinity.

Regardless of the kind of camera you select, you’ll need to find a reliable network with a strong WiFi signal. It’s essential that the device has encryption, so the data can’t be intercepted. You should also look for a company that hasn’t had any history of security breaches. This is an important factor to consider when selecting any smart home or business gadget, from security cameras to smart lights and locks.

Privacy

The concept of privacy is closely associated with security, and a security camera is an important part of most home and business security systems. However, the use of a security camera can raise issues regarding privacy, especially when placed in private areas like bedrooms and bathrooms. Putting up cameras in these places is not only considered an invasion of privacy, but it’s also illegal in some states.

Cameras can be wireless or wired, and many are connected to the Internet. This allows you to access them through a smartphone app or website, and some are compatible with smart home hubs so that you can control them with voice commands or include them in your automation routines. Wi-Fi is the most common connectivity option, but Ethernet provides better data transmission speeds and is more secure against hackers. Cameras that connect to the internet may rely on cloud recording, which means your footage is stored offsite. This can be convenient if you don’t have enough storage space on your home network, but it does mean that your camera recordings won’t be available if you lose your Internet connection.

An alternative to cloud recording is local recording, which means your camera records directly to a hard drive in your home. This is more reliable than a Wi-Fi or cellular connection, but it can be expensive if you have a lot of storage space to fill.

A common feature on security cameras is motion detection, which alerts you to any movement around the camera. You can customize your settings to only notify you of movements from specific areas or objects, such as cars or people. There are even cameras that recognize faces, so you can receive notifications only when someone known to you moves near the camera.

As with any Internet-connected device, security cameras are susceptible to hacking and privacy violations. It’s important to change the default login credentials on your camera, and make sure that your password is strong and complex. You should also check whether your camera uses encrypted streaming and whether it has a history of data breaches.

How to Keep Weeds at Bay With Proper Lawn Care

A lush lawn adds beauty to a home or business and provides a great place for kids to play. However, proper lawn care requires more than just cutting grass and occasionally watering it.

Lawn Care

Lawn care practices can produce substantial alterations in nutrient and hydrologic cycles and in ecosystem structure and function. This is particularly true in residential areas, where yard care often involves large amounts of pesticides and fertilizers. Visit https://www.primecutlawnky.com/ to learn more.

Weeds can cause a lot of stress and take valuable nutrients from your desired plants. Keeping weeds at bay helps the lawn grow thicker, which will also help to suppress disease and insect pests. There are a few ways to keep weeds from overtaking the lawn:

If the weeds are young enough hand-pulling them can be a simple, cost effective solution. This is easiest in the spring and fall when the weeds are smaller. If a hand-pulling method is not possible then using a garden hoe or similar tool will get the job done. This can be especially helpful if you have to be more precise about removing a weed that is next to a plant you want to keep, like a perennial flower or ground rose.

Mulching is a great way to reduce the number of weeds that grow in your yard. Mulching keeps the weeds from getting sunlight, which they need to grow. It also prevents them from accessing the soil beneath, which can be a rich source of nutrition for weed seeds and seedlings. The best mulch is one made of organic materials, such as straw, grass clippings, leaves or pine needles.

Another option is to use a pre-emergent herbicide in the spring. This is a type of herbicide that is used on an annual basis to control weeds in the early stages. This type of herbicide controls the weeds by blocking their ability to absorb sunlight and photosynthesize, which kills them.

There are different types of herbicides on the market, such as systemic and contact. A systemic herbicide is absorbed through the root of the weed, which makes it more effective against perennial weeds. A contact herbicide only kills the parts of the weed that are exposed to the sun, which is more effective against annual weeds.

If you do decide to use a chemical herbicide then be sure to read the label and follow instructions carefully. Be sure to test the product in a small area of your lawn to make sure it is safe for your plants and people. A combination of cultural practices and an initial application of a weed killer in the spring, followed by spot treatments throughout the summer, should be enough to keep your lawn weed free.

Fertilization

Fertilizing helps to ensure your lawn has the nutrients it needs to be healthy. It also encourages thick grass, which is less prone to weed invasions. Using fertilizer is best done after a soil test, as the results will let you know how much and what type of nutrients your soil needs.

There are two main types of lawn fertilizers: organic and inorganic. Organic fertilizers are made from natural materials like microbes, animal manure, compost, and fish emulsion, and they provide the most benefits for the soil. Inorganic, or chemical, fertilizers are manufactured from chemicals and are typically cheaper. They aren’t as good for the soil, though, and they can be harmful to the environment.

When it comes to fertilizing, the type of grass you have and the soil pH level will help determine what nutrients are needed. If you’ve had a soil test, the results will tell you how much and what type of nitrogen, phosphorous, and potassium (K) to use. You’ll also want to choose between quick-release and slow-release fertilizers. Quick-release fertilizers provide a quick burst of nutrients to the plants, but they need to be applied more often. Slow-release fertilizers release their nutrients more slowly into the soil and require fewer applications.

Most granular fertilizers need to be watered after applying them, which will help push the nutrient granules into the soil and make it easier for your grass to absorb them. If you don’t water them immediately after fertilizing, they can start to burn the leaves of your grass, which is called “fertilizer burn.” If this happens, soak the area with water every day until the burn heals.

It’s best to apply your fertilizer a few days before you plan on mowing, since the lawn needs to be dry for it to take in the nutrients. It’s also a good idea to aerate and overseed your lawn before you fertilize, as this will prepare the ground for the addition of nutrients and help to fight off pesky weeds. It’s also important to avoid fertilizing near bodies of water, as this can cause algal blooms that are unhealthy for wildlife and people.

Weed Removal

A well-maintained lawn can prevent weeds from sprouting by keeping them crowded out. Pulling them by hand or using a chemical herbicide is one way to do this, but it’s time-consuming. The better approach is to prevent weeds from growing in the first place by adjusting your lawn care routines.

Avoiding over-fertilizing your lawn, especially in late summer when it’s most vulnerable to nutrient leaching, can also reduce the number of weed seeds that are produced. This is especially important in areas where weeds are more likely to take over, such as around walkways or driveways.

Regular mowing can help prevent weeds, especially those with wide leaves such as dandelions and plantains. Mulching clippings rather than bagging them can return valuable organic matter to the soil and help keep weeds from germinating. If a weed is too big to pull, try to catch it before it goes to seed. This can be done by spotting them with a glance while mowing or by using a grass whip or string trimmer to cut off their flowering heads.

A few weeds are usually no problem, but many can crowd out desirable plants and choke them out by taking away valuable nutrients and water. If a weed is so large that it’s not possible to pull by hand, use a hoe or a garden spade. Other tools, such as a rake or a dandelion grubber, can also be used.

Weeds that spread by root and seed (such as oxalis) are difficult to control without resorting to chemicals. This weed resembles clover with heart-shaped leaves and yellow flowers, but produces upright seed pods that explode when they’re ripe. This weed can quickly overtake a lawn, gravel drives or vegetable garden paths. If you must kill oxalis, be sure to wear gloves and work in a shady area.

A few weeds are often no problem, but many can crowd out desirable Plantains and dandelions can grow easily in lawns, although they tend to grow better in sandy or loamy soil. It’s easy to weed out a few weeds by hand or using a herbicide, but tackling their deep roots is more challenging. Changing cultural practices and promoting healthy grasses can stop weeds from taking over, as well as prevent them from spreading by root and seed.

Mowing

A lush, green lawn is a staple of any yard, but achieving it requires more than just the right mower and some fertilizer. The grass needs to be regularly mowed at the appropriate height for the type of grass and its growth patterns, as well as when weather conditions are optimal. The best way to ensure that mowing is done properly is to hire a professional lawn care service, who will have the right tools and experience for the job.

Lawn mowing is one of the most common services included in lawn care packages and it can be done using a variety of techniques. The most common is to simply mow the entire yard once a week. This is often the most efficient way to maintain a lawn, but it is possible to vary the mowing pattern to achieve a different look. For example, mowing in long stripes or diagonally can add to the visual appeal of a yard, while also keeping it looking neat and tidy.

It is also important to remove any stray grass clippings from sidewalks and driveways to avoid a muddy appearance and prevent fungus problems. Many lawn services include this task as part of their package and can use a lawn vacuum or sweeper to get the job done quickly and efficiently.

Some lawn care services offer additional services beyond basic mowing, such as dethatching. Thatch is a thick mat of dead grass and leaves that can block sunlight and water from reaching the grass roots, encouraging diseases such as fungus. Regular mowing, some clipping removal and occasional dethatching can keep thatch from forming and improve overall lawn health.

Finally, a few lawn care companies will treat their customers’ yards for harmful insects between mowing treatments. This service can be useful to homeowners who aren’t comfortable spraying insecticides themselves and it can help them save money by reducing the number of times they need to call in pest control experts.

While it is possible to perform some of these lawn care tasks on your own, hiring a professional will provide the best results and the most convenience. Whether you want to have a yard that is the envy of the neighborhood or you just need time to spend on your weekends, having a professional take care of your lawn will give you both.

Why You Need an Auto Accident Lawyer

You might not need a lawyer to handle your car accident case. After all, the at-fault driver’s insurance company seems to offer a reasonable settlement offer.

However, if you’re not getting enough compensation, it might be time to hire an attorney. Auto Accident Lawyer Maryland can help you recover damages for medical expenses, lost wages, property damage, and pain and suffering.

Getting involved in an accident is traumatizing. Whether the crash is minor or severe, victims are often in shock and may not notice any physical injuries until days after the incident. This is why it is important for car accident victims to visit a doctor or urgent care center immediately after an accident, regardless of how minor the symptoms seem. This will help ensure that any potential injuries are identified and treated, reducing the risk of long-term health complications.

It is also important to visit the doctor for documentation purposes, as detailed medical records are critical evidence in personal injury cases and legal claims. If you do not visit a doctor, insurance companies might argue that your injuries are not serious or related to the accident, jeopardizing your chances of securing compensation. Visiting a medical professional immediately after an accident will provide the needed documentation to prove that your injuries are directly linked to the incident, which in turn increases your chances of receiving fair compensation.

When choosing a healthcare provider, opt for an emergency room or a clinic that is experienced in handling car accident injuries. Make sure that the facility accepts your health insurance, and that the healthcare professionals are certified. You should also keep a copy of your medical documents, as they will be necessary to file a car accident claim and receive compensation from stakeholders.

Internal injuries, such as whiplash or soft tissue damage, can be difficult to diagnose based on initial physical observations. These injuries typically take days or even weeks to manifest as symptoms. If they are not diagnosed and treated promptly, these injuries could cause lasting physical and emotional problems, including chronic pain, mobility issues, and other long-term health issues. Visiting the doctor immediately after a car accident will allow healthcare professionals to perform a thorough examination of your body and identify any hidden injuries, ensuring that they are promptly treated.

If you’re experiencing any symptoms after a car accident, don’t wait to get checked out. Make an appointment at a local hospital or urgent care center, and do not leave the scene of the accident until the police arrive. This will ensure that you are properly assessed and treated for any injuries, which can prevent future complications and improve your chance of receiving compensation from the at-fault parties.

Documentation

Car accidents are a common occurrence, and often, the victim’s injuries can be serious and debilitating. As such, they can be expensive to treat. Furthermore, the injuries can also impede on a person’s ability to work and may require modifications to their home or car in order to accommodate their physical limitations. It is for this reason that car accident victims must seek medical attention immediately following a crash in order to not only treat their injuries but to build a strong personal injury claim.

Medical documentation provides irrefutable evidence that supports your case. It shows the extent of your injuries and when they occurred, allowing you to demonstrate that the injuries you have suffered are directly related to the accident. Likewise, medical documentation demonstrates the need for continued treatment and supports your claim for past and future medical expenses.

The documentation compiled by your physician can also serve as expert testimony, relating the severity of your injuries and how they affect your life. This can help increase the compensation you receive. Additionally, your attorney can use medical documents to calculate the cost of your damages and establish the amount you should be compensated for. This includes your monetary losses, such as medical bills and loss of income. It can also include your non-monetary losses, such as pain and suffering.

In some cases, the defense can argue that your injuries are not connected to the accident and were pre-existing. In other words, they can assert that the injuries you claim were sustained in the car accident are not as severe as you make them out to be. Robust medical records that support the extent of your injuries will help sway the insurance company to settle on your behalf rather than fighting the claim in court.

In addition to medical records, your lawyer will need invoices and receipts for prescription medications and other healthcare costs that you have incurred in the course of your recovery. This will allow your lawyer to calculate the total amount of financial and non-economic damages you are entitled to under the law.

Contact the Police

A police report serves as a verifiable record of the accident, improving your chances of successfully proving negligence in an insurance claim. Even if the damage to your vehicle and personal injuries seem minor, you should still request that a law enforcement officer respond to the scene. Officers can facilitate the exchange of information between parties, including the name, driver’s license number, registration and policy numbers for both vehicles and insureds. The responding officer can also run a record check to protect against fraudulent claims.

Police reports are designed to be unbiased descriptions of the accident. Officers don’t have a vested interest in who was at fault for the crash, which allows them to capture important details that can strengthen your legal claim. The report may include observations regarding how the accident occurred, witness statements and conclusions about what caused the collision.

Your lawyer will use this information to build your case for compensation. This includes determining your medical needs, the extent of any property damage and other damages that you may have sustained. Your attorney can then work with the insurer on your behalf to secure a favorable settlement.

In some cases, a negligent driver will attempt to decrease his or her liability by changing the facts of the accident. If this happens, your attorney can review the police report and identify any inaccuracies that can be corrected through proper channels.

It is important to remember that you should never speak to the other party’s insurance company before speaking with a representative from your own insurer. Anything you say to the other party’s insurance agent can be used against your car accident claim later on. Even the smallest inconsistency can impact your case, so it is always best to have an attorney on your side. An experienced auto accident lawyer will know what to look for in a police report and how to correct any inaccuracies that can affect your claim. Inaccuracies in a police report can significantly delay or derail your auto accident claim. You should contact a skilled car accident attorney as soon as possible to help ensure that your rights are protected.

Contact an Attorney

While many people assume they do not need an attorney after a minor car accident, it is vital to contact one as soon as possible. A lawyer can explain how the laws in your state apply to your case and protect you from making any statements that could be used against you. It is also crucial to have a legal professional document your injuries and their impact on you. This will help establish causation and is a key component of most negligence cases.

An attorney can also ensure you get full compensation for your losses. This includes past and future medical bills, rehabilitative care, property damage, lost wages, and pain and suffering. Attorneys are trained to calculate these costs and are skilled at negotiating with insurance companies to secure fair settlements.

A lawyer will know the most effective methods for gathering evidence, including witness testimony and photographic and video footage. They can also assist with determining fault and liability through an analysis of the law of torts. The law of torts is a set of principles that dictate how parties are responsible for causing and suffering injury or death to another party. Negligence is the basis for most tort claims in car accidents. This involves failure to act with the ordinary care that a reasonable person would use in similar circumstances.

It is also important to have an experienced lawyer handle all communications with the defendant’s insurance company. This includes oral or written statements as well as the submission of documents. It is important to remember that the insurance representatives are not your friends and will do everything in their power to reduce their responsibility and limit your compensation. An experienced lawyer will be able to guide you through this process and protect you from giving statements that could harm your case.

When choosing an attorney you should consider their level of experience and the resources they have. You should also find out if they work on a contingency fee basis. This means that they will only be paid if they win your case, which aligns their interests with yours and encourages them to work hard to maximize the recovery of your damages.

How a Plumber Fixes Plumbing Problems

Plumbers install and repair piping, fixtures, and appliances that facilitate water distribution, waste removal, and temperature control in homes and commercial buildings. They use specialized tools to inspect pipes and identify issues, and collaborate with construction teams and architects to ensure plumbing systems are integrated effectively into building projects.

Plumbing

A career as a plumber can be highly rewarding, but it can also be physically challenging. The job requires heavy lifting and working in tight spaces. For professional help, contact Plumber In Glendora.

A squeaking sound from your plumbing can be quite annoying and even upsetting. It may wake you up in the middle of the night or disturb your peace when you are working at home. The noise can also be a sign of serious plumbing problems that need urgent attention. Fortunately, there are various ways to fix these problems. Detecting and fixing them on time can keep your pipes from getting damaged and ensure that you will have a peaceful nights rest.

A high-pitched squealing sound is often an indication that the flow of water through your pipes has been restricted. This could be due to a loose washer or a faulty faucet. Having a plumber check and replace the parts can resolve this issue. The noise can also be caused by a dirty or loose aerator. A squealing noise from your taps can be particularly irritating if it occurs near appliances like washing machines and dishwashers. This is because they cause significant movement, which can wear down washers faster and make the squealing noise.

Creaking sounds are a common problem associated with copper hot water pipes. This is because the temperature changes in your home can cause the copper to expand and contract. This causes the pipes to scrape against each other and other components like wall studs and floors. You can prevent this by lowering your hot water temperature or by using rubber casings to cushion the expansion and contraction of copper pipes.

If you are hearing a loud banging noise from your plumbing, this is probably an indication of water hammer or trapped air bubbles. When a faucet or valve shuts off, it abruptly stops the water’s momentum. This creates a pressure wave that can damage the pipes and other plumbing components. This issue can be prevented by using water hammer arresters or having a plumber install pressure regulators.

A dripping sound from your plumbing is a sign of a leaky pipe or faucet. This can be a major problem because it wastes gallons of water and leads to higher water bills. The leaking water can also cause structural damage to your home. A dripping sound from your plumbing can be very difficult to diagnose and troubleshoot, so you should contact a plumber as soon as possible to repair the problem.

Clogged Drains

Drain clogs are one of the most common plumbing problems. Grease, hair, soap scum and other debris can stick to pipe walls and prevent water or waste from flowing properly. If you notice a drain is slowing down or not working at all, it’s time to call a plumber for a professional drain cleaning service.

While many people assume a plumber has special tools to unclog drains, some clogs can actually be fixed using simple DIY methods. For example, if your kitchen sink or bathtub drain is clogged with food scraps or other debris, try pouring a mixture of baking soda and vinegar down the drain. The chemical reaction will help to break up and dislodge the blockage, and the hot water will flush away any remaining residue.

If your drain is completely clogged and snaking or other DIY methods don’t work, shut off the water supply valve to the house and call a plumber. These professionals have specialized equipment, such as motorized augers, to quickly and effectively remove any size clog from your home’s drain lines.

Chronic clogs are often caused by improper venting of your drain pipes. If you’ve tried to clear a clog but it keeps coming back, check your vents to make sure they are open and free of obstructions. If your vents are blocked, a professional plumber can install new ones to ensure proper drainage and ventilation of your drain plumbing system.

Another cause of clogged drains is hard water. This type of water contains mineral deposits that can reduce flow and clog pipes over time. If you have hard water in your home, consider installing a water softener to help prevent buildup and keep your drains running smoothly.

If you suspect a root problem in your sewer line, a professional plumber will use a chemical treatment like Hercules R-D Root Destroyer to kill any unwanted growth and stop future clogs. Once the line is cleared, your plumber can recommend a maintenance solution to keep your lines free of clogs and root intrusion.

Leaky Cartridges

Cartridge faucets can develop a slow and steady leak, especially over time. This usually means that the seals are worn out and need to be replaced, but it can also mean that a cartridge is overheating or not degassing correctly. A professional plumbing expert will be able to identify the issue and make the necessary repairs.

A common reason for a leaky cartridge is that the oil in the cartridge has become thin due to overheating. The heat causes the cartridge to lose its integrity, and this can cause a number of problems. For example, it can lead to the cartridge leaking or even coming off of the stem. This can be fixed by using a kit from the manufacturer to remove and replace the cartridge. A plumber can also ensure that the replacement cartridge is an exact match to your shower valve and will work correctly. They will also replace the O-rings on the new cartridge, and this will help ensure that it stays in place once it’s installed.

Another reason for a leaky cartridge is that there are cracks, dents, or physical damage to the cartridge. This can lead to the cartridge leaking, which is why it’s important to handle your cartridges with care. You should also check your cartridge regularly to see if there are any issues.

Leaking is also caused by a bad O-ring or by a loose screw on the shower handle. These are relatively simple fixes that a plumber can make. They will first turn off the water supply to your faucet and then take apart your handle, removing the handle cap or the set screw to access the internal components. Once the plumber has removed the old cartridge, they will insert a new one and then put everything back together. They will ensure that all the parts are properly seated, tightened, and sealed and that they are the correct type for your faucet.

Once the plumber has installed a new cartridge and checked for any other issues, they will turn on your water supply slowly. This will allow them to see if there are any leaks or fluctuations in pressure or temperature that they need to address. They can then reseal any connections and tighten any loose ones as needed.

Faulty Seals

When pipes are installed, seals are placed around the water connectors to ensure they remain watertight (like the seal on a new dishwasher). Over time these seals can wear out or break, causing water to leak out. A plumber will be able to identify and fix this problem quickly.

Another common cause of plumbing leaks is corroded pipe walls. This can happen due to a variety of reasons, including excess pressure from clogs, which causes the sides of pipe walls to wear down. It can also happen if the pipe is made of a material that reacts with water, such as metal or vinyl (PVC is one example). A plumber will be able to identify and repair these problems quickly.

A final common reason for plumbing leaks is a broken water trap seal. These are found in many homes, and they’re usually located under sinks or in the basement. When these seals wear down, it allows moisture and odors to escape into the home. This can be prevented by having a plumber inspect the water trap on a regular basis, and replacing the seals when necessary.

Faulty seals are a fairly common problem that a plumber will deal with on a daily basis. These can be caused by a number of things, such as excess sediment in the pipes (which is often a result of minerals from tap water) or just simple wear and tear. Replacing these seals can be a relatively easy DIY project for most homeowners, but if the pipes are hard to reach, it’s best to leave this job to a professional plumber.

Advantages of 3D Printing

3D Printing Phoenix AZ, is a method of creating a physical object from a virtual model. It builds objects from a variety of materials layer by layer.

Its roots are in rapid prototyping, enabling manufacturing companies to design and build prototypes quickly. But it can do much more. The possibilities are endless.

One of the most impressive aspects of 3D printing is that it is much more cost-effective than traditional manufacturing methods. This is especially true for prototyping, where 55% of companies using 3D printing reported significant cost savings. 3D printing saves money by only using the material necessary to create the desired object, eliminating costly waste. Additionally, 3D printing is faster than traditional methods, allowing for quicker iteration of products and faster time to market.

For manufacturers, the ability to quickly and inexpensively produce prototypes opens up a wide range of possibilities for product design. This can allow for designs that are not feasible with traditional manufacturing processes, such as complex geometries and materials that would be cost-prohibitive to machines or mold. In addition, it allows for more rapid product testing and development. This can make a substantial difference in the speed of time to market for new products and help reduce costs for existing production.

There are a number of different types of 3D printers, from filament-based FDM and SLA to laser-curing and powder-bed fusion machines. However, they all share one thing in common: they can create parts from a variety of materials. Plastic is the most popular and cost-effective, but composites (like carbon fiber or Kevlar strands) can be used to make parts with an excellent strength-to-weight ratio. Metal is also a viable option for some applications, and can be printed with high precision.

Another way that 3D printing can reduce costs is by reducing or eliminating the need for secondary machining operations to achieve a perfect fit between mating surfaces. This can be accomplished by designing the part to be printed in layers or by using materials that are more forgiving of surface finish or dimensional accuracy.

For businesses, this means that they can focus on what matters most to them—the design of their product. Nevertheless, it is important to remember that many of the parts produced by 3D printers will eventually transition to molding or casting, so they must be designed for manufacturability. The best way to ensure this is by performing a design for manufacturability analysis early on in the process.

Advanced Prototypes

During product development, it’s critical to test and evaluate prototypes before committing to a full production run. Using 3D printing, you can quickly create models or functional prototype parts to get an overview of your project. This gives you the chance to spot any problems early in the process and make adjustments before it’s too late.

3D printing is a rapid prototyping technology that uses layer-by-layer fabrication to translate digital CAD files into tangible objects. The process can create a variety of materials, including plastic and metal. Popular plastic processes include selective laser sintering (SLS), fused deposition modeling (FDM) and stereolithography. Using these, you can print intricate details and high-strength components for use in product design. The resulting prototypes can also be sanded, polished and painted for aesthetic purposes.

Traditional manufacturing requires a significant amount of time and money to produce tooling, which limits designers in how many prototypes they can make. With 3D printing, you can easily swap out the prototype material and make a final part without having to modify a finished design. This helps you improve the quality of your final product and reduce costs.

Additionally, 3D printers can print a range of plastic materials that mimic the properties and appearance of the final product, allowing you to conduct more testing and evaluation in a short period of time. The materials you choose can impact both the appearance and the strength of your product, so it’s important to research your options carefully before making a purchase.

Having a physical prototype of your project can significantly enhance its credibility when presented to investors, board members or the public. It’s a powerful way to show that your idea is worth backing and can help you secure financing or investment funding.

With 3D printing, you can print a prototype that closely matches your final product for presentations and demonstrations. A company that specializes in additive manufacturing can build large scale industrial prototypes for use in testing, visualization and advanced marketing. These models and parts can withstand the same rigor as their final manufactured counterparts, and can be built in a number of materials to fit your specific needs.

Localized Production

The ability to print parts at the point of manufacture and/or use significantly reduces transportation-related emissions. This decentralized production model also enables companies to avoid costly sourcing and inventory constraints that often limit their agility in the face of market uncertainty.

The 3D printing process itself is more eco-friendly than traditional subtractive manufacturing methods, as it builds objects layer by layer using only the material required for each part. Additionally, the increased availability of filament recycling devices — which repurpose waste plastic from failed prints into new materials — further supports reduction in wasted raw material consumption.

In addition, the design freedom provided by 3D printing allows for a greater variety of materials to be used in the production of goods. Manufacturers have a wide range of options for creating custom-tailored products to meet specific performance requirements, including strength, heat resistance, water repellency and more.

For example, Montefiore uses 3D printers to fabricate pre-surgical anatomical models for surgical planning and patient education. The hospital’s Radiology Department has a 3D printing lab run by Dr. Laura Wake, who is able to operate the equipment at night and on weekends as she cares for patients. “It’s very useful for patients to have models that show the exact location of the tumor and how it relates to other organs,” she said. “It makes the patient feel more confident going into surgery.”

Additionally, some manufacturers are utilizing 3D printing to support localized production and decentralized supply chains. For example, during the early stages of the COVID-19 pandemic, Danfoss was unable to get polymer supplies for its injection molding process, so it used a 3D printer to create critical parts for their heating and cooling systems that allowed them to resume operations.

Similarly, Adidas embraced 3D printing to enable customers to customize their sneakers by choosing different colors and textures of the uppers, soles and laces, which allows them to be printed locally and delivered on-demand, eliminating the need for long-distance shipping. As a result, this type of production bolsters the resilience of the supply chain and can mitigate climate change impact.

Sustainability

Whether it’s creating new products or improving existing ones, 3D printers can save manufacturers time, money and resources. In addition, the technology can also help businesses meet sustainability goals and reduce waste.

The process of printing a product from scratch uses little energy, and most machines only require the power needed to heat the printing materials and operate the printer itself. This helps to cut down on greenhouse gas emissions and other harmful environmental pollutants.

Printing a three-dimensional object is a complex and lengthy process, but one that uses fewer resources than traditional methods of production. The manufacturing sector is responsible for a significant portion of the world’s carbon dioxide emissions, and many companies are working hard to improve their carbon footprints and become more sustainable.

In order to print a product, a computer model is used to create a layer of wax or plastic-like polymer for the printer to build upon. This layer is then deposited on top of other layers to create the final product. This approach reduces the number of parts needed, which cuts down on manufacturing processes, inventory, labor, assembly, certification paperwork and maintenance costs. It also reduces the amount of waste material created, as each piece is printed to the exact specifications of that part’s use.

Another way that 3D printing can reduce the carbon footprint is by prioritizing local materials for production. This allows companies to produce items using local and renewable materials, and cuts down on the carbon footprint caused by transporting materials across long distances.

Lastly, 3D printing can reduce the amount of materials used by optimizing designs and eliminating wasted space and extra materials. This allows the manufacturer to produce a final product that uses less material than conventional methods, further cutting down on the amount of waste and resource consumption.

The possibilities for sustainable construction and manufacturing are endless. For example, building and engineering firm Arup is using a 3D printer to print special steel components on site for construction projects, which not only cuts down on lead times but reduces the environmental impact of importing heavy and expensive construction materials from the far reaches of the world.

Mold Removal – What You Need to Know

Molds grow on organic material and thrive in moist conditions, such as those found in a leaky roof or high humidity. They eat away at building materials and may cause health problems for people who are allergic to them.

Mold Removal

To clean visible mold spores from walls, mix equal parts bleach and water in a spray bottle. Apply to the affected area, saturating it completely, and scrub it with a brush. Contact Mold Removal Salt Lake City for professional help.

The first step in mold remediation is a thorough inspection by a trained and certified mold removal professional. The mold specialist will look for the cause of the mold, as well as its extent, and determine what needs to be done to remove it and prevent future occurrences. This includes identifying the type of mold, determining its severity, and assessing how the mold has affected the structure and materials in the home or business.

The next step is cleaning up the area where the mold has grown. This will include fixing plumbing leaks, removing and cleaning any porous materials (such as drywall), washing walls and ceilings with detergents and water, and scrubbing and drying all surfaces infested by mold. Mold spores can travel through the air and stick to any surface they come into contact with, so it is important to thoroughly clean all surfaces that are affected by mold. This will also help to deodorize the area and reduce the health risks associated with the fungus.

It is also crucial to fix any leaks or other problems that could have caused the mold growth in the first place. If the problem is left unaddressed, the mold will return. The last thing you want to do is simply cover up the mold with other materials and paint, as this can trap moisture within the wall and lead to new mold growth in the future.

When cleaning, always wear personal protective equipment like respirators and safety glasses or goggles to protect your eyes. It is also a good idea to open windows and doors to allow fresh air in the work areas, as using chemicals and scrubbing can create airborne particles that can irritate your nose, throat, lungs, and skin.

In some cases, it may be necessary to throw away any items that have been contaminated by mold. This is especially true of any porous or absorbent materials such as carpeting, drywall, and fabric-covered furniture. These items should be placed in heavy-duty garbage bags and disposed of as soon as possible to avoid the spread of mold spores throughout the house or building.

Removal

Molds can grow on almost anything, but they thrive in areas with an organic food source and moisture. It is important to remove any items that are affected by the mold and then dry the area thoroughly.

Mold removal is an involved process that requires professional knowledge and experience. A trained mold remediation specialist will come out to assess the situation, identifying what is causing the mold, and how it has spread. They will then put up plastic or polyurethane sheeting between the affected area and the rest of the building to keep spores from spreading to unaffected areas.

Next, the area will be cleaned. This step is usually done with a bleach solution (although chlorine bleach is not an EPA-approved biocide), however, this does not always kill mold spores. It is recommended to use an EPA-approved fungicide or moldicide solution. It is also important to scrub the affected areas with a wire brush and then wipe them down with disposable wipes, which are then double-bagged and tied off to prevent mold spores from dispersing throughout your home or business.

After the contaminated areas have been cleaned, the team will use dryers and other tools to ensure that the room meets a specific humidity standard. This will prevent the mold from coming back later on, as it thrives in areas with high humidity.

The next step is to spray the area with an EPA-approved biocide, which will destroy the mold and its spores. This solution is often used in combination with a dehumidifier to ensure that the mold is completely eliminated from the affected areas.

After the biocide has been sprayed, the professionals will deodorize the area to get rid of any musty smell that may be left behind. They will also spray the area with an EPA-approved fungicide, which will prevent the mold from returning. Finally, they will test the air quality to ensure that all spores have been killed and the area is safe for habitation.

Disinfection

Mold spores are all around us and we encounter many of them throughout the day. However, when we are exposed to a high volume of these microscopic particles, they can cause a wide variety of symptoms like sneezing, runny nose, itching, congestion, rashes, and eye irritation. These symptoms are generally caused by the release of toxins and allergens into our bloodstreams by the mold spores. The good news is that there are steps we can take to reduce our exposure and protect ourselves from the health hazards of a massive mold infestation.

Mold removal is typically done through a combination of cleaning and disinfection. Cleaning consists of physically removing the mold from surfaces and household materials using specialized cleaning agents. This may include scrubbing and sanitizing hard surfaces such as floors, countertops, and furniture. In addition, it may involve removing porous or absorbent materials such as carpeting, drywall, and insulation that are contaminated with mold. Often, mold remediation will also involve utilizing air filtration systems to ensure that the spores are not spread elsewhere in the home.

Disinfection is the process of killing remaining mold spores and bacteria using a biocide such as chlorine bleach. This is important because it will help prevent the return of any fungus that remains after the initial cleanup. Unlike regular bleach, however, mold cleaning products are specially formulated to kill the specific types of bacteria and fungus that grow in homes.

Once the mold has been removed and the area has been disinfected, it is necessary to dry the area. This is because mold thrives in damp environments. Dehumidifiers and fans should be set up to assist in this process. Then, the affected areas must be thoroughly inspected by sight and odor to ensure that all of the mold has been eliminated. If it has, the area can be repaired and painted using a latex paint that contains a mildewcide to inhibit future mold growth.

Remediation

Mold spores are always present, so even if you kill the visible mold and remove contaminated materials, it’s almost impossible to guarantee that all spores have been removed. Remediation involves ensuring that the area is clean enough for occupants to safely return to the property.

The first step in remediation is a thorough inspection and assessment of the affected space. This will determine the extent of the damage and how much mold has grown. Professionals will also identify any health concerns caused by the presence of mold.

Next, the restoration company will establish containment measures to prevent the spread of mold spores to unaffected areas. This may include sealing the affected area and using negative air pressure to keep spores from escaping. They’ll then use specialized cleaning agents and techniques to physically remove the mold from surfaces and materials. This will include scrubbing and wiping down hard surfaces, including carpeting and carpet padding, as well as removing porous items like drywall, insulation material, and some clothing. They’ll dispose of all contaminated items appropriately.

Moisture control and addressing any other problems that led to the initial mold growth are key to preventing future growth. This might include fixing a plumbing leak, removing excess humidity or addressing water damage. The restoration company can also install fans and dehumidifiers in the affected area to help control moisture levels going forward.

When the mold remediation is complete, it’s important to wait a few days before re-entering your home. This is because spores can still be released into the air during cleanup, and breathing in these spores can cause health concerns. If you have respiratory issues or allergies, it’s a good idea to speak with a doctor before returning to your home.

While it’s almost impossible to completely remove all mold spores, a successful mold remediation should get the area back to a normal fungal ecology and reduce the level of toxins in the air. It should also be a safe environment for occupants, and air quality tests can confirm this. 

What Is Concrete Repair?

Concrete Repair is the process of restoring and maintaining concrete structures. It addresses safety hazards such as cracks, spalling and potholes, and extends the lifespan of the structure.

Concrete Repair

Surface preparation is key to a quality repair. A poorly prepared surface can cause the repair to fail. A good surface must be clean and suitably roughened. Proper curing is also important. Contact https://concreterepairbismarck.com/ to learn more.

Concrete cracks are common and can cause damage to the surface or interior of a structure. While they aren’t always a sign of a major problem, it is important to identify and address them as soon as possible to prevent the cracks from widening.

To begin the repair process, it is crucial to thoroughly clean the cracks and surrounding areas to ensure that any remaining debris does not interfere with the success of the repair. A pressure washer and detergent will work to remove any dirt or other materials that may have accumulated in the cracks, as well as any rust or paint that has begun to appear.

Once the cracks have been cleaned, they should be inspected and diagnosed to determine their severity, cause, whether they are dormant or live, and what type of repair method is appropriate. A qualified and licensed inspector can determine this information based on a visual inspection of the existing concrete structure.

It is also important to consider the environment in which the concrete will be located when deciding on the best repair method. The amount of sunlight or fluctuating temperatures can affect the stability and durability of a structure. Concrete that will be subject to these conditions might require special treatments or a different repair method than concrete in an indoor environment.

There are several options available for repairing concrete cracks, including epoxy and latex patching products. These should be mixed according to the manufacturer’s instructions and applied using a mason’s trowel or putty knife. The product should be pressed into the cracks and smoothed to match the surrounding concrete. Different repair products cure differently, so it is important to consult the instructions provided with your specific product.

Whether you are working with an epoxy or latex product, it is important to dampen the area before applying the repair. This will help to prevent the material from drying too quickly and trapping air pockets within the cracks. This step is especially important for concrete in cold environments, as the expansion and contraction of the concrete can result in more serious cracks than would normally occur.

Leaks

Concrete slabs are a part of many homes and businesses. They are often used as foundations, basements or flooring. Over time, they can experience creep, cracks and surface scaling. These problems can be exacerbated by leaks that damage the internal structural integrity of the concrete. Slab leaks are particularly damaging because they can release water or sewage under the home. They can also cause significant damage to the home’s structure and can be difficult to detect.

The most obvious sign of a slab leak is moisture in the living areas. This can show up as staining, blistering of flooring, mildew and a general damp smell. It can even lead to serious health issues like respiratory problems. This is because the fungus that causes mould thrives in moist conditions. If you are noticing this in your concrete, it is essential to get it fixed before the problem worsens.

Another way to detect a slab leak is to pay attention to your utility bills. If you are experiencing a higher than usual bill but haven’t changed your water consumption, this could indicate that a pipe has burst under the concrete.

You may also hear running water or a hissing sound when the leak occurs. A plumber can use electronic equipment to locate the source of the leak and isolate it for repair. They can also use hydraulic cement to plug the hole in the concrete slab with a rapid-setting product, such as Kryton’s Krystol Plug.

To prepare for this, it is important to remove any items that are near the leak. This will help to protect them from dust and dirt while the concrete repairs are done. You should also wear protective gear including gloves, goggles, a mask, and heavy-duty clothes.

Once the area is prepared, it is best to use a cold chisel and a hammer to chisel out any large pieces in the crack. This is known as “keying” the crack, and it helps the new patching material to bond with the old concrete. You should then apply the concrete patching. After it has set, the area should be protected from traffic rain and freezing temperatures until it can fully cure.

Stains

Concrete stains penetrate the surface to impart long-lasting color that won’t chip, peel or fade. Stains are often available in earth tones that compliment a variety of architectural styles and personal tastes. Concrete staining is also a popular choice for hiding imperfections in concrete, such as cracks and discoloration.

A quality stain will enhance the look of your concrete and can be used indoors or outdoors. When applying a stain, it’s important to follow all label instructions and mix product thoroughly prior to application. Adding a concrete bonding primer to the surface can help increase adhesion to existing concrete and provide an even base for the new color.

The surface preparation is the most important factor in ensuring a successful concrete stain project. The concrete must be clean and free of dirt, dust, oil, and grease. If you have old paints, sealers, or adhesives on the concrete, they must be stripped using a chemical stripper. Oil spots should be treated with a degreaser and neutralizer before staining.

Stains are available in both acid-based and water-based formulas. Acid stains use an acidic solution of inorganic metallic salts and hydrochloric acid to create the desired appearance. This method of coloring produces mottled effects that resemble natural stone and marble and requires additional safety precautions than water-based stains.

Water-based stains do not utilize an acidic agent, but instead use acrylic polymers and pigments to penetrate the surface of the concrete. These stains are typically easier to apply and offer more color options than acid-based staining.

Before applying a stain, it’s critical to test the color on a small area of the concrete to ensure the results meet your expectations. Additionally, it’s best to stain concrete in the morning when the temperature is cooler to allow the stain to dry consistently. Applying a stain while the concrete is hot can result in a splotchy and uneven finish.

Staining can produce harmful fumes and should be done in a well-ventilated area. For this reason, it is important to wear proper safety equipment such as gloves, protective clothing, and a respirator when working with chemicals. It’s also a good idea to set up fans to keep the workspace adequately ventilated.

Scaling

Concrete scaling is a serious deterioration condition that exposes the coarse aggregate particles on the surface. It is the result of excessive exposure to environmental stressors such as water, deicing salts, harsh chemical cleaners and freeze-thaw cycles. While it is impossible to eliminate concrete scaling completely, taking proper preventive measures such as using air-entrained concrete, avoiding the use of deicing salts and other harsh chemicals, ensuring optimal concrete mix design, employing effective finishing techniques and observing adequate curing and protection processes can significantly reduce the severity of scaling damage.

Thoroughly cleaning the scaled areas prior to repairing is essential. This allows for better bonding between the new repair materials and the existing concrete. Choosing high-performance repair mortars that are designed to withstand the effects of moisture and other harsh environmental conditions, such as SpecRez and Cure & Seal 25, is also recommended. These types of repair mortars help prevent the occurrence of future scaling by providing a protective barrier against moisture penetration and freeze-thaw damage.

The best repair method depends on the extent of the damage and the desired outcome. For minor surface wear or spalling, a patching material may be sufficient. For more severe damage, the use of a high-strength resurfacing material may be required. Regardless of the repair method used, it is critical to allocate enough time for the project so that thorough assessment and precise execution are possible.

While conventional repairs can be messy, aesthetically unpleasing, leave injection holes and take a long time to complete, new technology such as PolyLevel has revolutionized the concrete repair industry. PolyLevel is a two-part polyurethane polymer that’s injected beneath sinking or damaged concrete through pencil eraser sized ports, expands into a structural foam that compacts the soil underneath and lifts the concrete slab back to its original position. The system is quick, noninvasive, aesthetically pleasing, doesn’t require concrete removal, requires no clean up and is moisture-free. It is an environmentally friendly alternative to traditional methods and addresses the underlying problem of poorly compacted soil that causes concrete to sink. For more information about repairing concrete with PolyLevel or to schedule your free estimate, contact us today.

Behind the Scenes: The Work and Skills of Plumbers 

Plumber Sarasota installs, maintains, and repairs plumbing systems. These may be in homes, commercial or industrial buildings, or public facilities. Plumbers must be familiar with a wide range of tools and systems.

Plumbers

They also inspect and test plumbing systems for safety, functionality, and compliance with regulations. To succeed as a Plumber, you need excellent customer service skills and strong critical thinking abilities.

The faucet handle is one of the most visible components of a water fixture, so when it starts to crack or wear, it can be a big deal. Replacing the handle can give your sink a fresh new look and help with overall maintenance and upkeep. However, removing and installing the handle is a job for a professional plumber. It can be dangerous to work with water under pressure, and it’s best to leave this task to a licensed plumber for safety and efficiency reasons.

Before you remove your old handle, turn off the water supply valve under the sink to prevent any accidental water leaks. You may also want to wrap a towel around the drain to protect your floors and counters from splashes or spills.

If your faucet has a decorative cap that covers a screw, use a screwdriver to pry it off and expose the handle set screw. Once you have the screw removed, pull up on the handle to remove it from the faucet. A screwdriver is often enough to loosen the set screw, but if it’s stuck, try using penetrating oil or gently tapping with a mallet.

Once you’ve got the handle off, it’s time to inspect and repair the internal parts. Check the washer and O-ring for wear and tear, as these are common culprits for leaks. If the washer is cracked or damaged, you can replace it with a new washer from a local hardware store. A new O-ring is also available for purchase, and it’s a good idea to change it when you replace the washer.

If your faucet is leaking from the cartridge, it’s a good idea to replace the cartridge as well. This is another job that can be done without the help of a professional, but it’s important to take your time and ensure the cartridge is seated correctly in the faucet body. Once you’ve replaced the cartridge, reassemble the entire faucet and test it for functionality and proper seating. If the handle still won’t seat or the cartridge is leaking, it’s best to call a professional plumber for further inspection and replacement.

Faucet Seat Replacement

The valve seat is the component in a faucet that creates a seal when water flows through it. A worn out valve seat can lead to a leak, and can be repaired by replacing it. Replacing a valve seat is relatively easy, but it requires that you shut off the water supply to the faucet. Once the water is off, you can remove the handle and then unscrew the faucet body to access the valve seat.

If the seat is a good match for the faucet, you can insert it and then screw it back in place using a clockwise turn. However, if the new seat is not an exact fit for the faucet, you may need to use tools like a valve seat grinder or dresser to reshape it in order to get a good seal.

Once the new seat is in place, you can screw the faucet body and handle back into place. Be sure to tighten the new valve seat firmly, but don’t over-tighten it. Once the faucet is reassembled, turn the water back on underneath and check for leaks and proper function.

Plumbers often work in residential homes, but they also work in many other types of buildings and environments. Commercial and industrial environments present different challenges for plumbers, who may need to deal with larger systems that serve multiple occupants. For example, a hospital or manufacturing plant may require complex plumbing equipment that needs to be installed, maintained, and repaired.

A career as a plumber requires a high school diploma or equivalent, and extensive on-the-job training. Most plumbers receive their education through an apprenticeship program, which lasts four to five years and includes both classroom instruction and paid on-the-job training. In addition to on-the-job experience, most states require that plumbers pass a licensing exam.

Plumbers must be able to think critically and solve problems quickly. They need to understand how systems work, and be able to read blueprints and other technical documents. They also need to have the physical strength to lift heavy equipment and tools. Lastly, they must be able to communicate with customers and explain their work in a way that makes sense to them.

Faucet Cylinder Replacement

Cartridge faucets are a special type of washerless faucet that uses a valve to control water flow and temperature. When this valve begins to wear out or lose its seal, it is time to replace the cartridge. While replacing a faucet cartridge can seem daunting, with some determination and basic tools, it is not difficult to do for most homeowners.

The first step is to shut off the water supply. This is usually accomplished by turning off the water at the valve located under the sink. Once the water is turned off, it is important to allow the faucet to drain completely before moving on to the cartridge replacement.

Next, the handle must be removed to gain access to the old cartridge. The handle is attached to the cartridge by a set screw or Phillips head screw that can be unscrewed with a screwdriver. Some handles are designed with a decorative cap that must be removed to expose the set screw. In this case, it is a good idea to use a strap wrench for extra leverage. After the handle and any caps are removed, it is necessary to remove the escutcheon. This is a flat plate that covers the screw or set screw and must be removed to reveal a brass retaining clip. This clip is typically U-shaped and surrounds two plastic tabs on the cartridge. It is necessary to note the precise orientation of these tabs so that the new cartridge can be installed in the same orientation. The retaining clip can be removed with a pair of pliers or a small screwdriver.

Once the retainer clip is removed, the leaking cartridge can be replaced. It is a good idea to lubricate the new cartridge with plumber’s grease before inserting it. This will help ensure that the cartridge fits correctly and that no water is leaking from the o-rings or other areas of the faucet body. Once the cartridge is inserted, it is a good idea to turn the water back on to test the new faucet.

If you are satisfied with the results, it is a good idea to label the faucet with the date of installation and any other relevant information. This will help you to track the life of the cartridge and anticipate when it will need to be replaced. It is also a good idea to keep an extra cartridge on hand for future emergencies.

Faucet Valve Replacement

A plumber’s duties include installing and repairing pipes that facilitate water, gas, or waste disposal in residential and commercial settings. They may also inspect a property’s plumbing systems to ensure they function properly. They must have certain soft skills to succeed in this career, such as communication and customer service.

One common plumbing repair involves replacing a shower valve cartridge. This type of fixture is a small component that’s located inside the shower handle, but it can cause major problems when it stops working. It’s important to shut off the water supply before attempting a replacement, and you should drain any remaining water in the pipes as well.

To begin, you’ll need a new valve cartridge and a few basic tools. First, remove the handle and escutcheon plate to expose the old cartridge. Once you’ve removed the old cartridge, replace it with the new one by screwing it into place and reattaching the handle. If the faucet has a metal clip that holds it in place, use needle-nose pliers to release it. Then, reattach the handle and trim plate. If the old escutcheon had a layer of calk securing it around its edges, apply a new layer using a caulking gun.

Another common type of plumbing repair is a faulty valve seat. This is usually caused by mineral deposits and sediment buildup that can wear away the surface of the valve seat. You can try to fix this by cleaning the valve seat with a steel wool pad, but this method isn’t always successful. A better option is to use a tool called a valve seat dresser, which is an inexpensive device that evens out a worn seat. Just be careful not to overdo it; you don’t want to wear away the entire seat.

You can avoid this problem by upgrading to a modern quarter-turn valve. These are less prone to leaks and lock ups, and they take only 30 minutes to install. You can buy them at your local hardware store. Before you start working, be sure to turn off the water at the main shutoff valve under your sink or in the house.